FRITZING IS STILL FREE! (HOW TO BUILD FROM SOURCE)
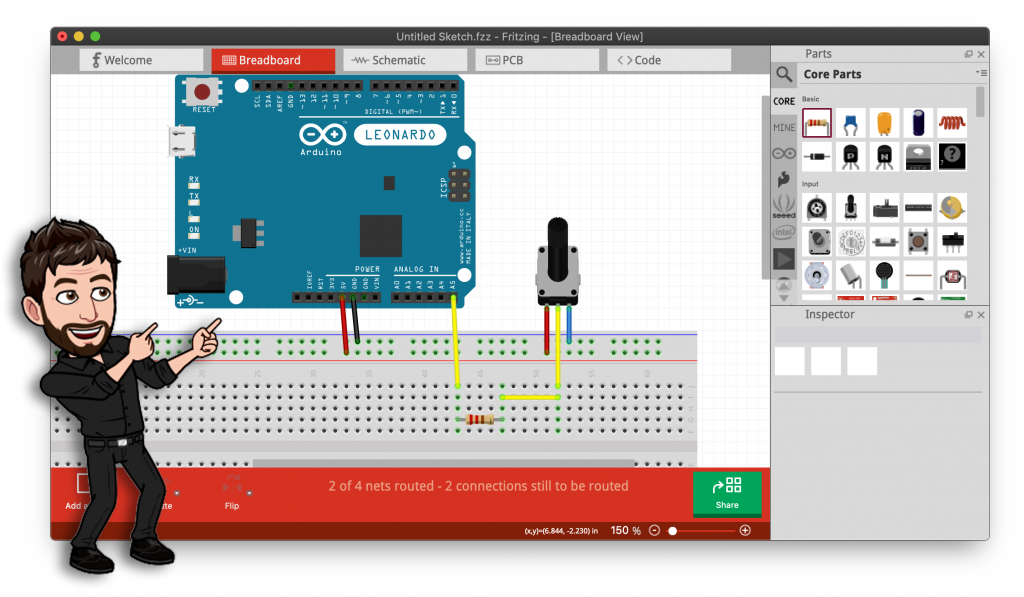
Want the latest version of Fritzing for free? This tutorial will teach you how to build the latest version of Fritzing from source code, which is still freely available from Github.
So what is building Fritzing from source anyway? Fritzing used to be a free to download community driven project but at some stage they introduced an enforced donation for downloading the appliction.
However the source code still remains available to download at no cost, so we can use some freely available tools to turn the source code into a working application. Fritzing can still be free!
Clik here to view.
Prerequisite
Setting up the tools for building Fritzing can be a little bit challenging but we will walk through it step-by-step. Once you have completed the first build, you will be able to quickly build new versions in the future so it is worth spending the time.
In order to build Fritzing you are going to need the latest version of Qt Creator. You can download it for free using the online installer.
- Windows users choose MinGW or msvcXX OpenGL and the latest version of Visual Studio. The latter is recommended in the official build guide.
- Mac users choose clang 64-bit
Windows users will also need Visual Studio for building Fritzing.
Download source code and dependencies
Whilst you download Qt Creator we can prepare the other required files. Go ahead and create a fresh directory called fritzing in a memorable location on your hard drive. I will be using Mac terminal, Windows users should use their native file structure (e.g. c:/fritzing)
mkdir ~/fritzing
cd ~/fritzing
Download Fritzing source
Now we need to download the Fritzing source code from Github. You can either download the .zip file from the Fritzing Github or use the command line with the git command if you have it installed.
Download the Fritzing app and extract it to your newly created Fritzing folder. Alternatively use the git command from within the fritzing folder.
git clone https://github.com/fritzing/fritzing-app
Download the Fritzing parts library and extract it to your newly created fritzing folder. Alternatively use the git command from within the fritzing folder.
git clone https://github.com/fritzing/fritzing-parts
If you go the route of downloading and extracting the .zip files, go ahead and rename the folders to fritzing-app and fritzing-parts.
Download dependencies
Now that we have the source code we need to download some additional dependencies.
Install Boost
Go ahead and download the latest version of Boost and extract it into your fritzing directory.
Mac users will probably want to download the .tar.gz version and Windows users will probably want to download the .zip version. However either will be ok so long as you have the tools to extract them.
Install cmake
Mac
If you don’t already have Homebrew installed, go ahead and open terminal and enter the following command.
/bin/bash -c "$(curl -fsSL https://raw.githubusercontent.com/Homebrew/install/master/install.sh)"
We can then use Homebrew install cmake with the following command.
brew install cmake
Windows
Windows users should download the precompiled binaries from the official website.
Install libgit2
Go ahead and download version 0.28.x of libgit2 from the Github releases page. Extract it into your fritzing directory and change the folder name to libgit2.
We will need to build libgit2 using cmake so go ahead and enter the following commands, substituting your chosen path for the fritzing folder.
cd ~/fritzing/libgit2
mkdir build
cd build
cmake -DBUILD_SHARED_LIBS=OFF ..
cmake --build .
Running Fritzing
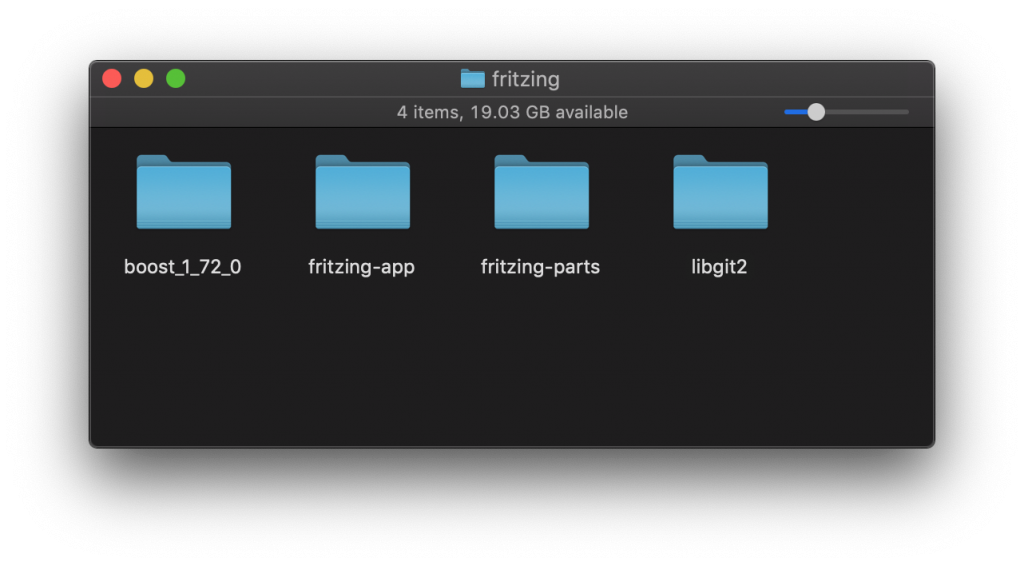
Now that we have downloaded all of the dependencies, you should have a folder containing the following.
- fritzing-app directory
- fritzing-parts directory
- libgit2 directory
- boost_x_x_x directory
Clik here to view.
Setup Qt Creator
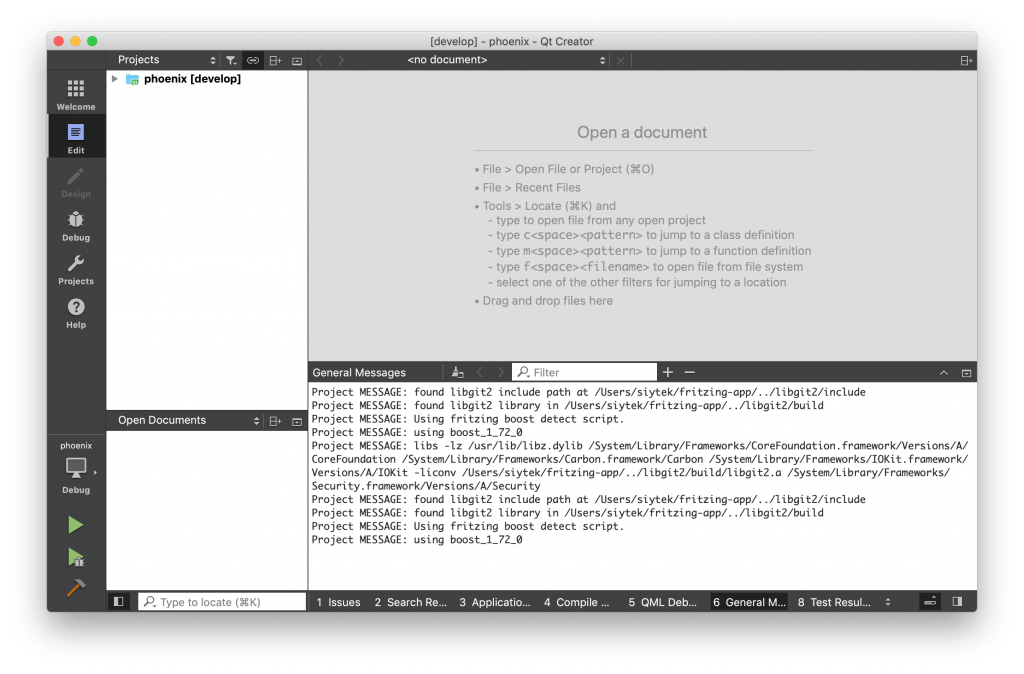
Once you have installed Qt Creator, go ahead and open fritzing-app/phoenix.pro located in the fritzing-app directory.
Open Fritzing in Qt Creator
This file will open in Qt Creator studio. If everything is configured correctly you should see some messages that state that libgit2 and boost have been found. Go ahead and click projects from the left-hand menu.
Clik here to view.
Add the first run command line argument
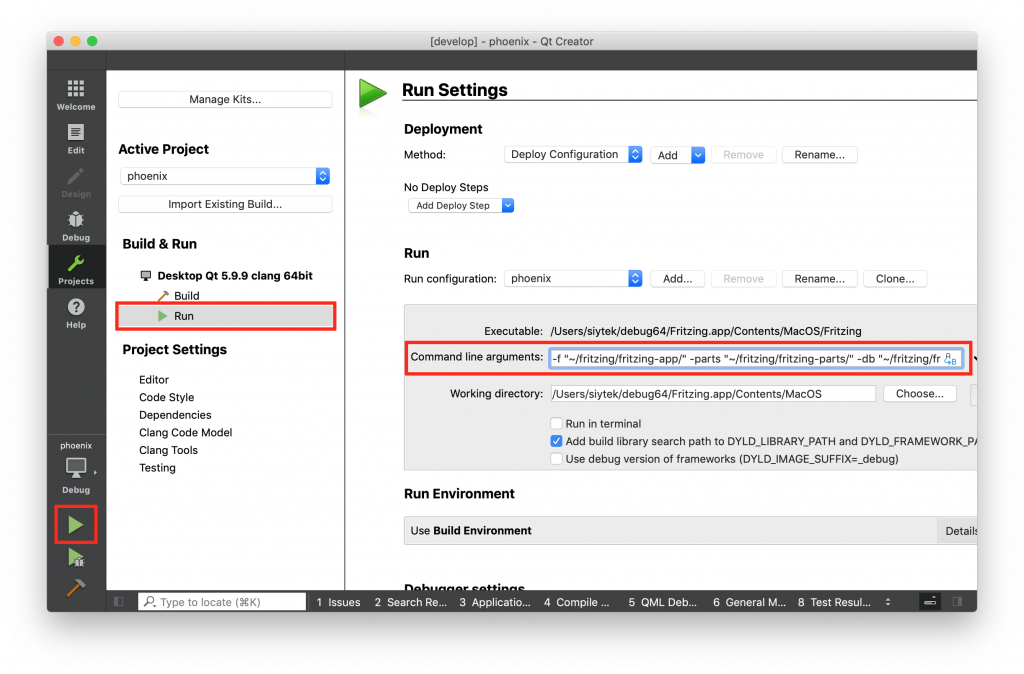
Next click run from the left-hand menu. We need to enter the following command line arguments, replacing the path for the path that you have chosen to locate the folders.
-f "/path/to/fritzing-app/" -parts "/path/to/fritzing-parts/" -db "/path/to/fritzing-parts/parts.db"
Once you have entered the command line argument go ahead and click the run button at the bottom of the left-hand menu. It will take a moment to build and then the Fritzing app should load for the first time. Awesome!
Clik here to view.
Add the subsequent command line argument
Once you are on the main Fritzing screen, go ahead and close the app. Then change the command line argument to the following.
-f "/path/to/fritzing-app/" -parts "/path/to/fritzing-parts/"
Qt Creator is now configured so you can go ahead and save the project. You can continue to use Fritzing via Qt Creator, however it is also possible to build an app.
Building Fritzing
Now we are ready to build a binary for Fritzing. This will give us a nice executable application that will run without the need for Qt Creator.
Build for Windows
Windows users will need to install Visual Studio in order to build Fritzing.
First we need to locate the file release_fritzing.bat stored in the fritzing-app/tools folder. Go ahead and open it your favorite text editor, Notepad will suffice if you don’t have a code editor.
You may or may not need to change the QTBIN directory for 64-bit builds. This directory should contain the qmake.exe file. If you edit the file path go ahead and save the file.
Clik here to view.
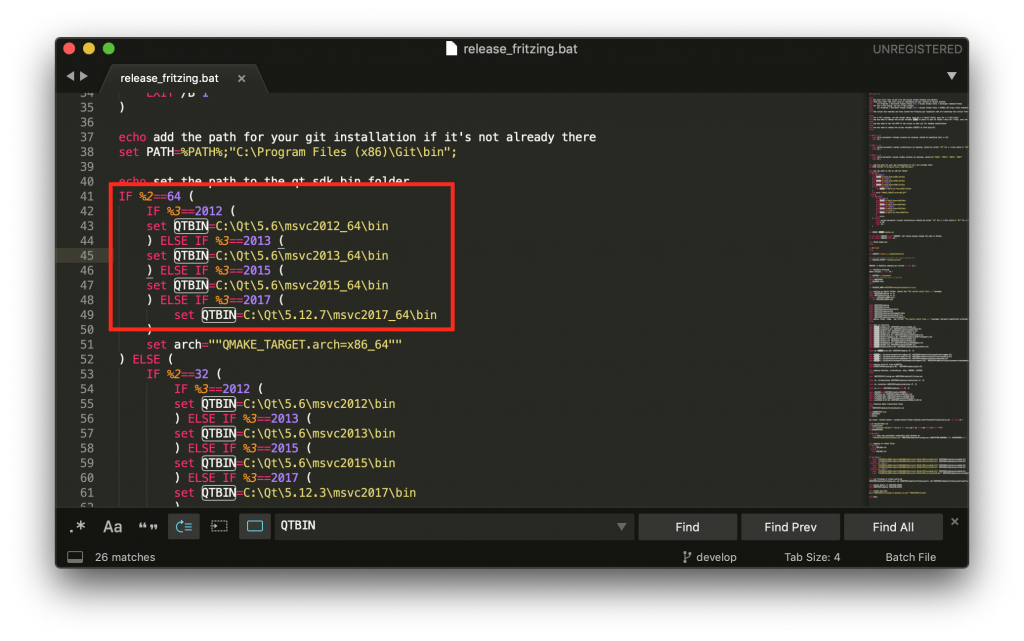
Next we need to open up a Visual Studio command prompt. This can be found on the Start menu under All Programs > Microsoft Visual Studio > Visual Studio Tools > Developer Command Prompt.
Simply drag and drop the release_fritzing.bat on to the command prompt and allow the compilation to occur, it may take a while. On completion you will have your very own completely free and fully functioning Fritzing program named fritzing.<version>.pc.zip and located in the releases folder. Awesome!
Build for Mac
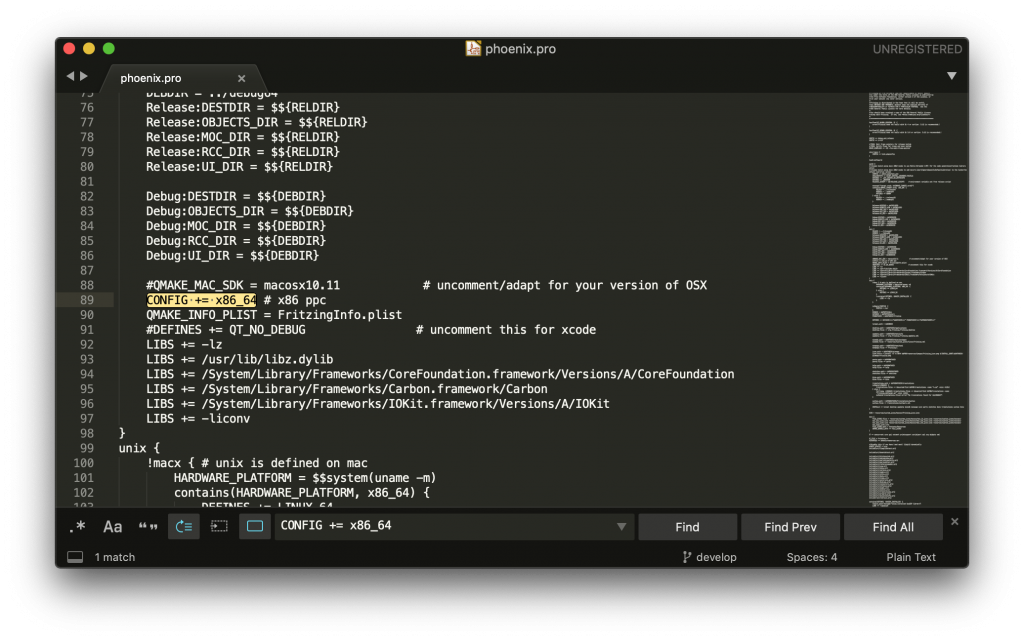
Go ahead and open fritzing-app/phoenix.pro with your favorite text editor. Locate the line CONFIG += x86_64 and make sure the x86 ppc is commented out (it should have a # symbol before it like in the screenshot). If you need to amend it go ahead and save it afterwards.
Clik here to view.
Next we need to check the path in the deploy_fritzing_mac.sh file located in fritzing-app/tools. Go ahead and open it in your favorite text editor and check that the QTBIN path contains the qmake file. Change the path if necessary and save the file.
Clik here to view.
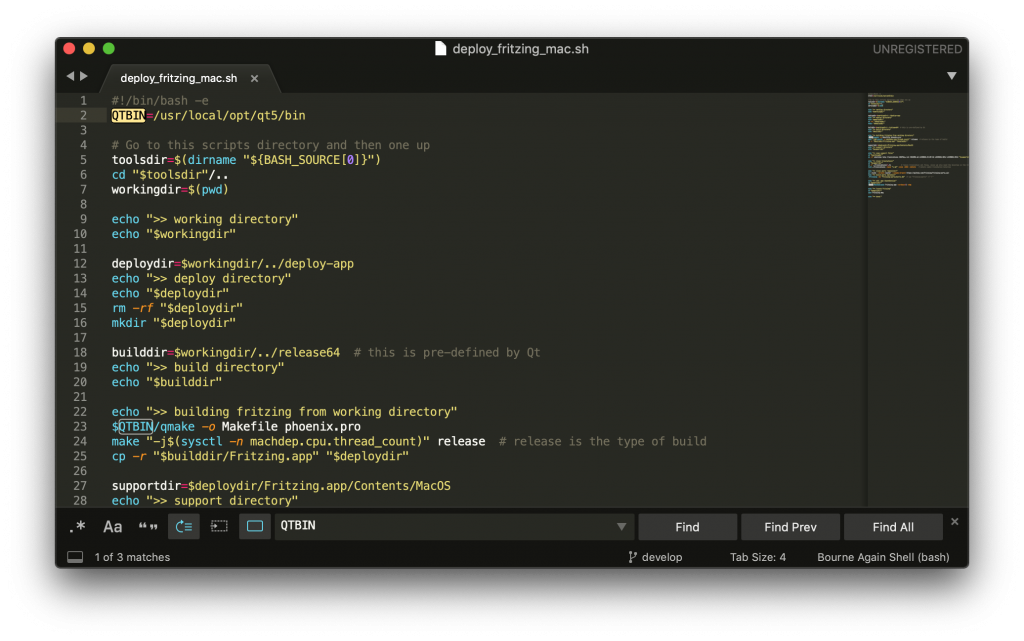
Now simply run the script to build Fritzing. You can do this from the terminal with the following command, using the path that you chose.
~/fritzing/fritzing-app/tools/deploy_fritzing_mac.sh
Once the script has finished building Fritzing, you should find the Fritzing app located in /fritzing/deploy-app. Awesome!
Conclusion
It takes a little work to setup the necessary tools for building Fritzing, however once you have successfully been able to build the app you will have your very own Fritzing binary, free to use forever!
If you ran into problems then it might be worth donating to the project as it is only a small amount that they ask for, and download the pre-compiled version.
Now that you have Fritzing installed, why not go check out some of my other awesome Arduino, ESP device or Raspberry Pi tutorials!