THINGS USED IN THIS PROJECT
STORY
Introduction
Using Carloop, Particle Electron, and a Blynk account, I’ve been able to visualize parameters from my vehicle at a 10-second update interval. In this project I’ll provide you step-by-step instructions for the following:
- Setting up your Particle Electron
- Connecting the hardware (Particle Electron, Carloop and to the OBDII port)
- Programming the Particle Electron
- Setting up your Blynk account
- Visualizing your data!
By the end of this project you should not only have your car’s data visualized via Blynk, but you should also gain a fundamental understanding of the canbus network, OBDII specifications, and Blynk. I hope you’re as excited as I am and would love to hear your ideas or take your advice. As I am no programmer by training, there are probably some improvements that could be made to how I’ve done things here, but that also may (hopefully) mean that my code is super readable!
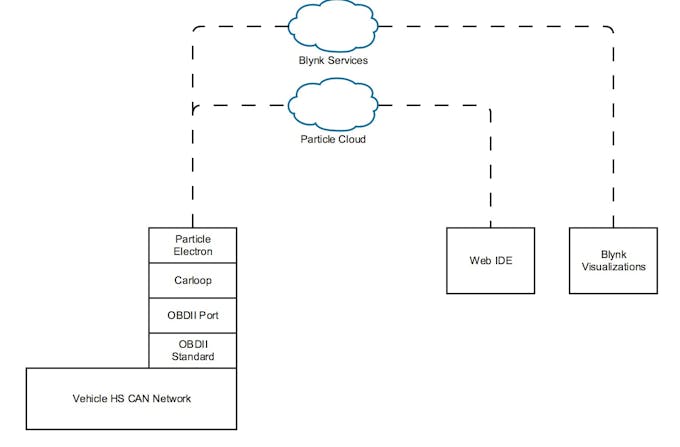
High Level View
Starting in the lower left, you’ll see Vehicle HS CAN Network. Two things to note about this:
- The CAN network is what everything else rides on (for our purposes). This means that if you hear someone mention OBDII or CAN in the same context, they are only the same in one direction. That is, OBDII is CAN. CAN is not OBDII. The OBDII standard rides on top of the CAN Network.
- HS = High Speed. There may be more than one CAN network on your vehicle. Most actually have two. HS and MS (Medium Speed). HS is usually system critical information, such as engine RPM or Mass Air Flow whereas MS CAN Network may contain information about what radio station you’re listening to.
So… we are going to be accessing the OBDII standard information as described here. There are other bits and bytes correlating to so many other sensors, but any standard likely stops at each manufacturer!
Setting Up the Electron
This part is super simple! Just head to particle.io for a great step-by-step guide that the folks at Particle have put together to get started. The process is straight forward, although the link won’t stand out at you if you speed read on Particle’s site. So here it is.
Connecting the Hardware
After unboxing, go ahead plug the Particle Electron into Carloop as shown –
Find the OBDII port on your vehicle. Usually this is located just under the steering wheel. This is where we will plug in Carloop.
Programming the Electron – Part 1
This will be a two step process. First we want to find out whats available from our car. Then we want to visualize that data (no sense in publishing sensors to Blynk that have no values).
To save you from having to do a ton of tedious work (see picture below) I’ve created a program that will poll all available PIDs from your car!
If you’re not familiar with the Particle Web IDE, I’ll help guide you through.
First, log in to build.particle.io
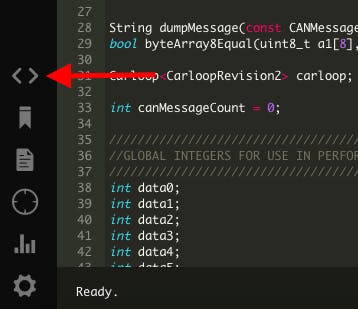
Click the code button in the lower left hand screen of the IDE options –
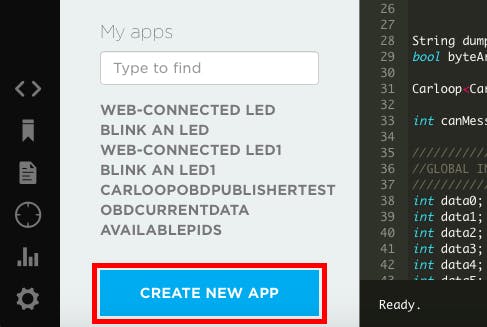
and then select “Create New App”
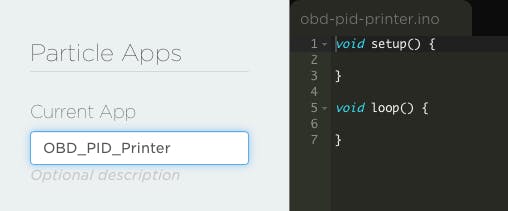
Give this “app” a name, here I’ve called it OBD_PID_PRINTER –
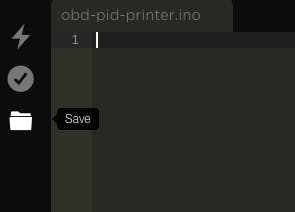
Click the “Save” button in the upper left menu –
Click “Libraries”, type “carloop” into the search field for Community Libraries and then click CARLOOP.
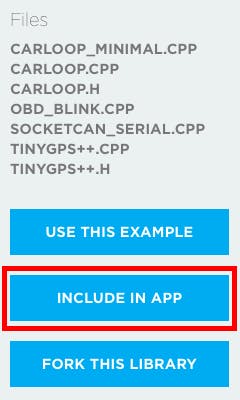
Select “INCLUDE IN APP”
Click the upper right “+” button to create tabs within your application.
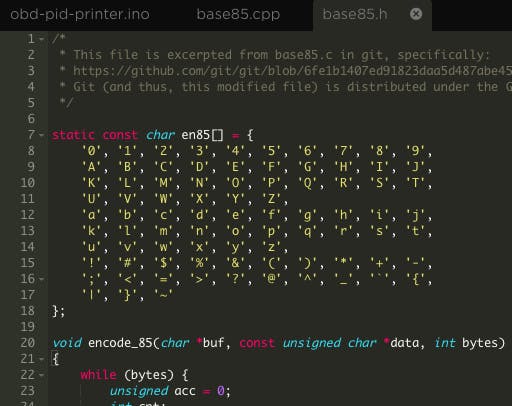
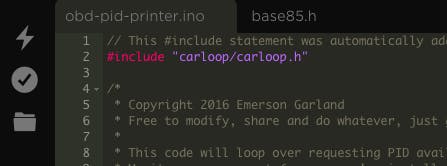
Rename lib1.h to base85 and copy/paste the code from here into that tab. It should now look as shown below –
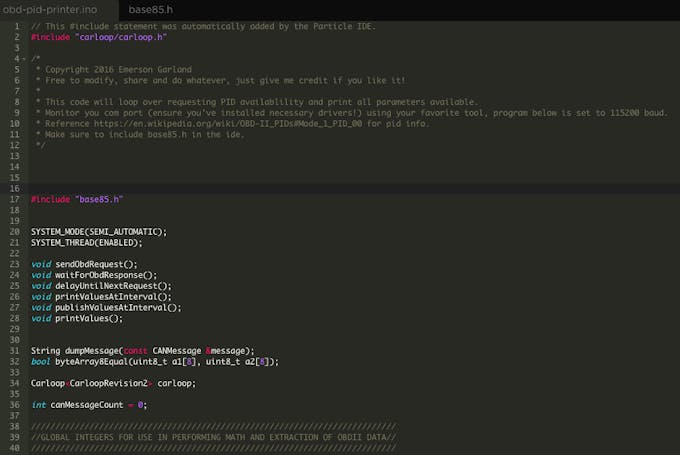
Remove the base85.cpp file and copy/paste the code here into your application file. In my case, it’s the obi-pid-printer.ino tab.
Click Save, Verify and Flash (if your Particle is powered on and connected to the internet).
Once we’ve successfully flashed the code onto the Particle Electron, the next step is to plug a usb cable into your computer and to the micro – usb port on the Particle. I’m assuming that the correct drivers are installed already. If not, here is a great introduction.
Plug the Particle, along with Carloop, into the OBDII port of your vehicle (usually located right under the steering wheel).
Start the car!
Read PIDs – Mac/Linux
After connecting your computer to the Particle, open terminal and type
ls /dev/tty.\*
Note the information regarding the usb connection and run the following command with your usb port information (if you have multiple devices plugged into your usb ports, you may have to unplug and plug in again to identify which tty.usb* is being applied to the Particle.
screen /dev/tty.usbmodem1411 112500
Example output:
Engine RPM
Intake manifold absolute pressure
Oxygen Sensor 2
Oxygen sensors present (in 2 banks)
Throttle position
If you’ve made it this far, congratulations!
Save all this information to a text file so we can use later.
Read PIDs – Windows
Install Windows drivers here if not already done so.
Using Device Manager, note the com port your Particle is using.
Open your favorite serial port monitor, select the com port found in Device Manager and set to 115200. Watch and save the output as a text file for later use.
Setup Blynk Account
Now we want to set up our Blynk account. Download from the iOS or Android app store.
Once you install and create an account, you’ll be presented with the option to Create a New Project.
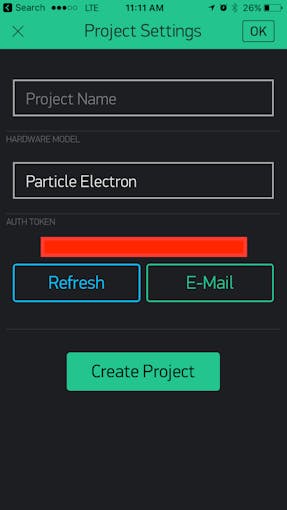
Give your project a name and select Particle Electron in the Hardware Model field.
Tap and copy Auth Token to clipboard or send to email address registered when you first installed the Blynk application. (We’ll use this in our code for char auth[])
Modify Example Code
Grab the next piece of code we are going to flash to the Particle here and paste it into the Particle web IDE just as before. There are a few things we need to modify before this code will work for you.
The first step is to update the char auth[] field within the code. Take the Auth Token you copied and sent to yourself and place it between quotes after the = sign. Don’t forget the ; at the end. Here’s an example:
char auth[] = "text copied from blank app";
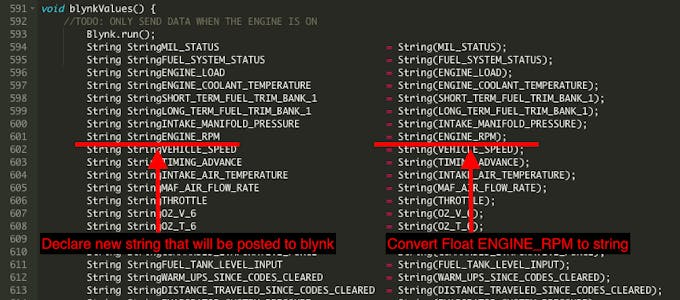
Now, scroll all the way down to the voidBlynkValues() function. Each sensor needs to be created as a string and we are publishing that value to Blynk (hence the StringEngine_RPM, String Engine_Load, etc. Feel free to use this as a template.
Take the text file you saved from before and configure each sensor you would like to see in Blynk and configure it here (Keep in mind, as you reduce the number of sensors, you are reducing data consumption).
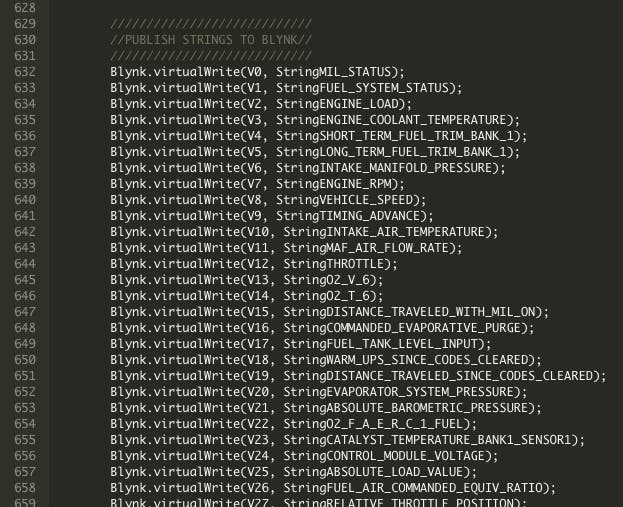
Scroll down a little further…In here you will see a ton of things already set. This is for my car, and I’m publishing each one of these values to a “virtual pin” denoted below as V0, V1, V2 etc.
Programming the Electron – Part 2
Now we want to flash the electron one last time. Using the code that you’ve modified from the previous section, flash it! Make sure you include the base85.h file in the same manor as the first flash you performed and include the Carloop library just as before. (Libraries > Search carloop > add to existing code)
You’ll want to additionally include the library for Blynk (Libraries > Search Blynk > add to existing code).
Note 1: If you get errors on compiling, look at the console. It’s there to help. Could be as simple as a library incorrectly added. If you run into issues here, I’m happy to help – just leave a comment below.
Note 2: I have ran into problems flashing my Particle after its been on for more than 30 seconds, I then have to press the reset button directly on the device and then upload once it gains access to the Particle cloud (breathing cyan). Not sure if this is an issue on other boards. I’m also using a T-mobile SIM.
Back to Blynk!
Now we want to configure the receiving end (Bynk) to plot or show the values you specified from within the voidBlynkValues function from the previous section.
Creating charts and gauges use “energy” and you can either earn energy by watching advertisements or pay up front for it. Best in-app purchase use I’ve seen in a while. You start with a certain amount of this “energy” and if you decide that you don’t like that particular visualization, you can always delete it and value will return back to you in-app bank.
To start, tap within the blank canvas area –
Select a widget you’d like to add to the canvas –
In this case, I chose to add a gauge. Some make sense for this application, others do not. Experiment!
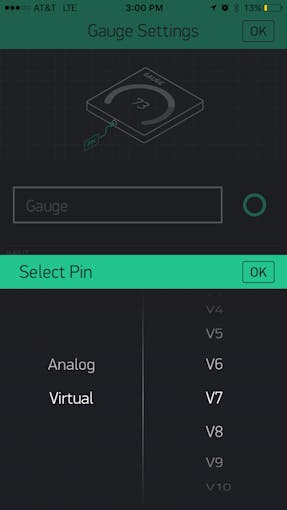
Tap “pin” and change from analog to virtual (remember those V0, V1, etc assignments from earlier?) and select Vn, where n is the number that corresponds to the data you would like to see. In my case V7 is Engine RPM.
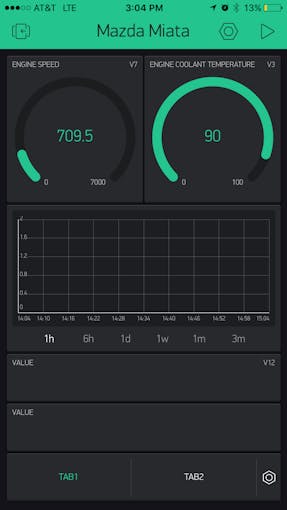
Keep adding until you’ve created something you like!
You’re Almost Finished!
Plug the Particle and Carloop into the OBDII port within your car if not already done so.
Start your car.
Ensure it has a connection (breathing cyan) and press the “play” button in the upper right corner of the application on your phone. I have noticed that Blynk may not detect that the Particle is online immediately. Give it a few seconds, try again. If all else fails, force quit and re-open the application. Once it gains the connection, it does not loose it.
Summary and Planned Updates
I hope that you’ve enjoyed connecting your car to the internet! Any suggestions/questions are welcome and I plan to actively update this procedure as the project changes on GitHub. Some planned improvements are:
- Converting the 1000 or so lines of code revolving around math for scaling and offsets into a library
- Working with Carloop to create a web interface application so that you will not have to climb in and out of your vehicle to monitor com ports.
- Separating the visualization tool for multiple services
- Incorporating remote control of certain functions (need to think this through)
- Auto configure data sent based on values available
- More details explaining how the code works
SCHEMATICS
CODE
Carloop Repository
CREDITS
REPLICATIONS
Did you replicate this project? Share it!


